Browser-based
Instructions to onboard your DIY miner using the ESP Tool web interface
Prerequisites
- A web browser
- 2.4GHz WiFi connection
- Android or IOS phone
MAKE SURE YOUR USB CABLE IS A DATA CABLE. MANY USB CABLES ARE POWER ONLY CABLES AND WILL NOT WORK FOR PROGRAMMING OR MONITORING!!!
Guide
Step 1: Download your firmware
- Download the firmware binary and note its location in your filesystem
- The filename will look something like
***.binwhere***is unique to you
- The filename will look something like
Step 2: Connect to computer
- Use a cable to connect your board to the USB port of your computer
- Boards have one or two USB connectors; on boards with two, either will work
Step 3: Open the browser
- Navigate to https://espressif.github.io/esptool-js/
Step 4: Connect to the serial port
-
You may need to install a driver to allow the board to communicate with your computer
- Instructions are here
-
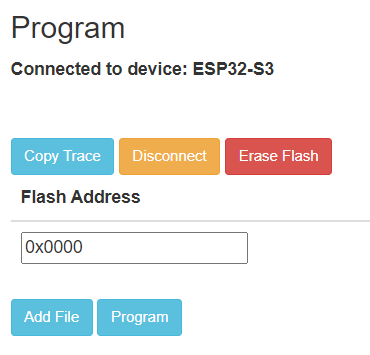
Under "Program", click Connect
- Leave the baud rate set to 115200

- Select the COM port corresponding to your device
- If there are multiple options and you do not know which one to choose:
- Close the dialog window and disconnect your board
- Click on
Connectand note which port disappeared - Close the dialog window and reconnect the board
- If there are multiple options and you do not know which one to choose:
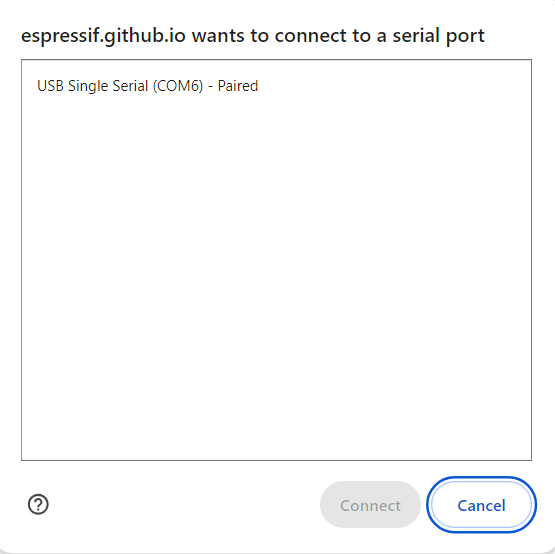
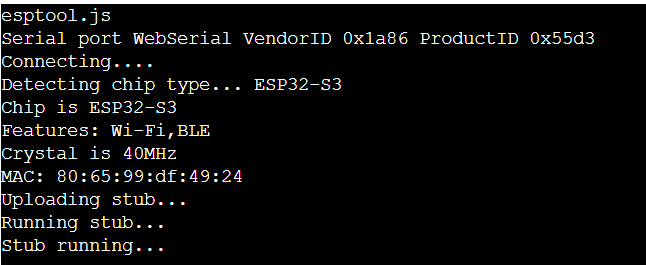
- After connecting, the console will display information that you have succesfully connected
Step 5: Erase the flash
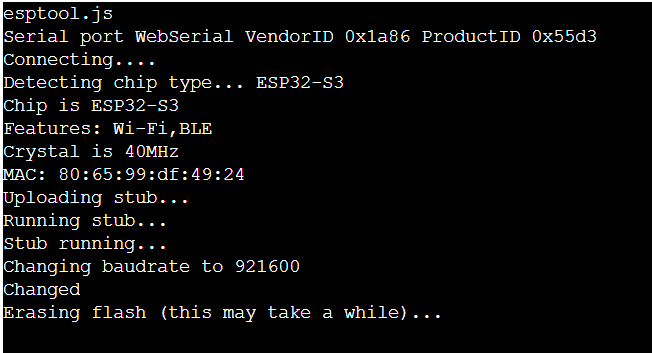
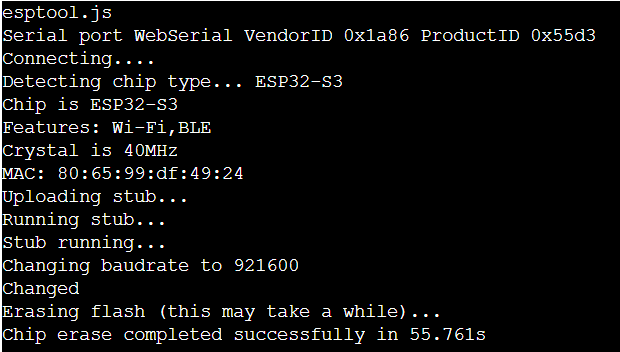
- Under "Program", click on Erase Flash

- The console screen will provide some information:
- The operation should complete quickly:
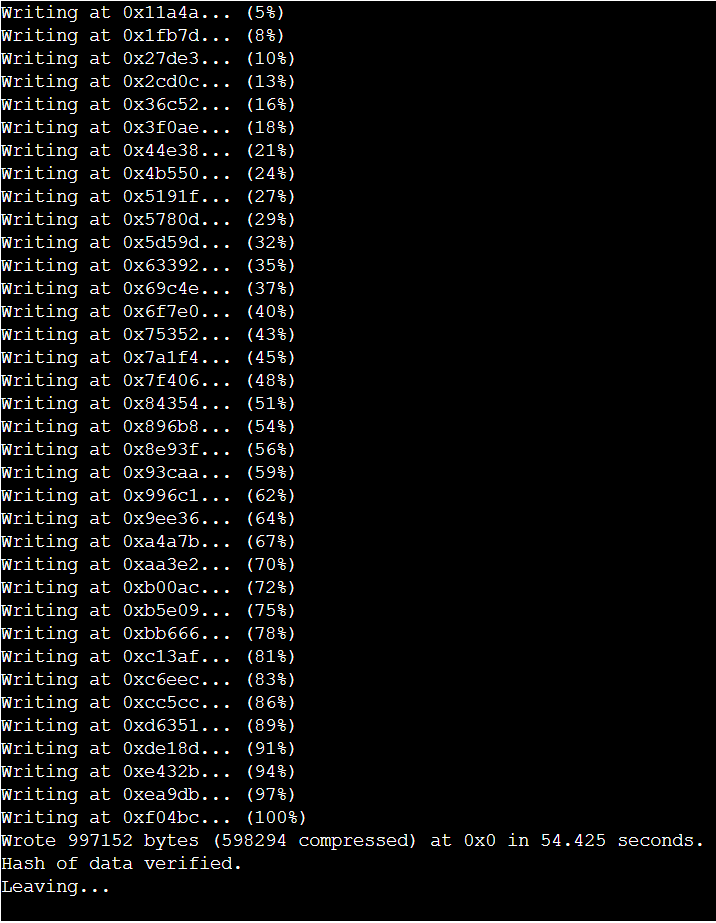
Step 6: Flash your device
- Set the flash address from the default
0x1000to0x0000

- Click on Choose File and select your firmware file from Step 1

- Click on Program
- The console should output something like the following:
- Click on Disconnect
Step 7: Verify that everything works
- Under "Console" on Start

- Select the same port as in Step 4
- Click on Connect and then Reset
- If successful, the console should show something like the below:
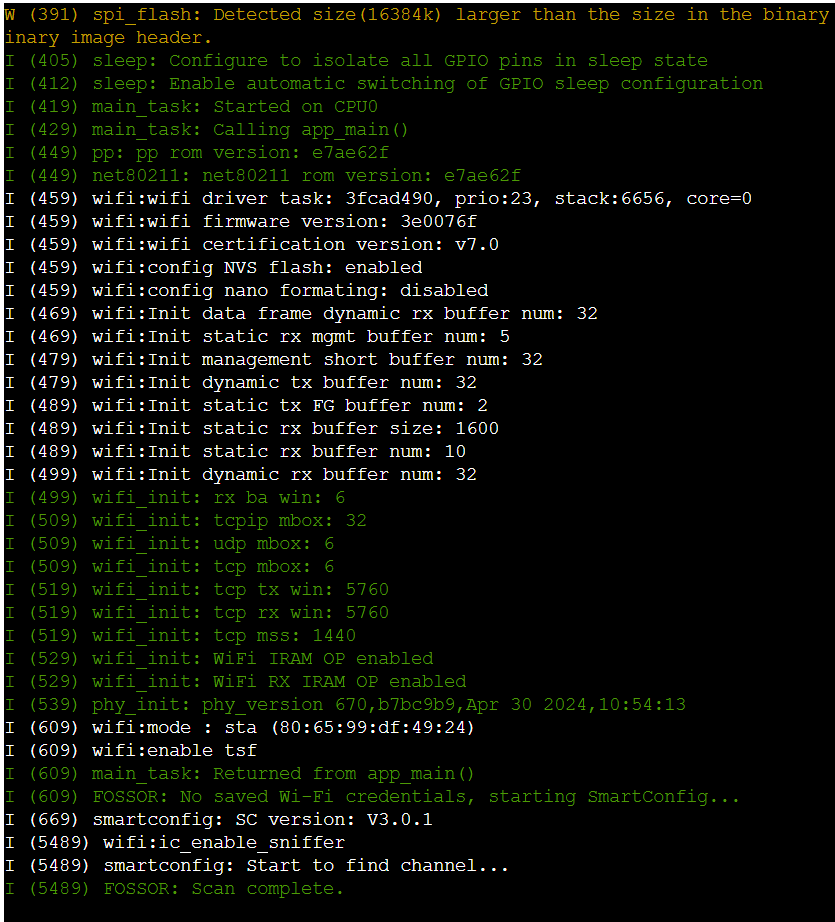
- In the following steps, you may leave the console connected to monitor the firmware
Step 8: Connect to WiFi [ESP32 boards only support the 2.4GHz band]
-
Download an ESP WiFi config app from your app store
-
Connect your phone to your WiFi access point
-
Open the app and share the password with the device
Step 9: Set it and forget it
-
Monitor the device using the serial console for as long as you like
-
Disconnect and plug the device to a 5V power source
- Any USB adapter should work
- Average current draw will be about 20mA, spiking to about 0.5A when connecting to WiFi, i.e., the power consumption is about 0.1W